¡Vite + Module Federation es INCREÍBLE!
Introducción
Personalmente, me encanta la simplicidad de Vite, así que en este post explicaremos paso a paso, de manera sencilla, cómo modularizar nuestras aplicaciones frontend para utilizar una arquitectura de microfrontend.
La arquitectura de microfrontend nos permite dividir partes de nuestra aplicación en módulos individuales y autónomos, brindando a los equipos frontend la misma flexibilidad y velocidad que los microservicios ofrecen a los equipos de backend.
Para este post usaré Bun, por lo que será una dependencia a tener en cuenta si deseas seguir el paso a paso.
Puedes instalar Bun siguiendo las instrucciones en este enlace.
Paso 1: Crear las aplicaciones host y remota
Primero, crea las aplicaciones host y remota de React usando Vite CLI.
bun create vite host --- --template react-ts
bun create vite remote --- --template react-ts
Paso 2: Configurar la aplicación remota
Ahora, instalemos las dependencias necesarias y agreguemos el plugin Module Federation a la aplicación remota.
cd remote
bun install
bun install @module-federation/vite
Crea una nueva carpeta y archivo para el componente que será expuesto por la aplicación remota.
mkdir ./src/components
touch ./src/components/ExampleComponent.tsx
Agrega el siguiente código al archivo ExampleComponent.tsx.
export default () => {
    return <span style={{
        backgroundColor: 'lightblue',
        borderRadius: '5px',
        padding: '5px',
        margin: '5px',
        display: 'inline-block',
        border: '1px solid black',
    }}>
    Module Federation 😎 </span>;
};
En el archivo vite.config.ts, agrega la siguiente configuración para exponer el componente.
import { federation } from '@module-federation/vite';
import react from '@vitejs/plugin-react';
import { defineConfig } from 'vite';
import { dependencies } from './package.json';

export default defineConfig(() => ({
  build: {
    target: 'chrome89',
  },
  plugins: [
    federation({
      filename: 'remoteEntry.js',
      name: 'remote',
      exposes: {
        './remote-app': './src/components/ExampleComponent',
      },
      remotes: {},
      shared: {
        react: {
          requiredVersion: dependencies.react,
          singleton: true,
        },
      },
    }),
    react(),
  ],
}));
Actualiza los scripts en el archivo package.json para construir y visualizar la aplicación remota usando el puerto 4174.
"scripts": {
		"dev": "vite --port 4174",
		"build": "tsc && vite build",
		"preview": "bun run build && vite preview --port 4174"
},
Construye y visualiza la aplicación remota.
bun run build
bun run preview
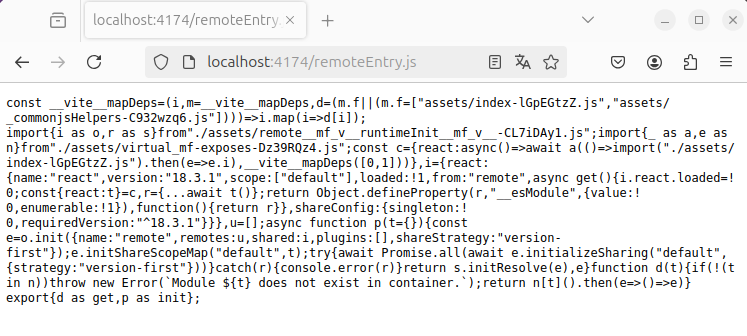
Si abres el navegador y vas a http://localhost:4174/remoteEntry.js, deberías ver el archivo de entrada remoto que será consumido por la aplicación host.

Paso 3: Configurar la aplicación host
Ahora, en otra terminal, ve a la aplicación host e instala las dependencias necesarias y agrega el plugin Module Federation.
cd host
bun install
bun install @module-federation/vite
En el archivo vite.config.ts, agrega la siguiente configuración para consumir el componente remoto.
import { federation } from '@module-federation/vite';
import react from '@vitejs/plugin-react';
import { defineConfig } from 'vite';
import { dependencies } from './package.json';

export default defineConfig(() => ({
	build: {
		target: 'chrome89',
	},
	plugins: [
		federation({
			name: 'host',
			remotes: {
				remote: {
					type: 'module',
					name: 'remote',
					entry: 'http://localhost:4174/remoteEntry.js',
					entryGlobalName: 'remote',
					shareScope: 'default',
				},
			},
			exposes: {},
			filename: 'remoteEntry.js',
			shared: {
				react: {
					requiredVersion: dependencies.react,
					singleton: true,
				},
			},
		}),
		react(),
	],
}));
Actualiza los scripts en el archivo package.json para construir y visualizar la aplicación host usando el puerto 4173.
"scripts": {
  "dev": "vite --port 4173",
  "build": "tsc && vite build",
  "preview": "bun run build && vite preview --port 4173"
},
Agrega el siguiente código al archivo App.tsx para consumir el componente remoto.
import { lazy, useState } from 'react'
import reactLogo from './assets/react.svg'
import viteLogo from '/vite.svg'
import './App.css'

const RemoteComponent = lazy(
	// @ts-ignore
	async () => import('remote/remote-app'),
);

function App() {
  const [count, setCount] = useState(0)

  return (
    <>
      <div>
        <a href="https://vite.dev" target="_blank">
          <img src={viteLogo} className="logo" alt="Vite logo" />
        </a>
        <a href="https://react.dev" target="_blank">
          <img src={reactLogo} className="logo react" alt="React logo" />
        </a>
      </div>
      <h1>Vite + React + <RemoteComponent/> </h1>
      <div className="card">
        <button onClick={() => setCount((count) => count + 1)}>
          count is {count}
        </button>
        <p>
          Edit <code>src/App.tsx</code> and save to test HMR
        </p>
      </div>
      <p className="read-the-docs">
        Click on the Vite and React logos to learn more
      </p>
    </>
  )
}

export default App
Paso 4: Construir y probar la aplicación
Construye y visualiza la aplicación host.
bun run build
bun run preview
Si abres el navegador y vas a http://localhost:4173/, deberías ver el archivo de entrada remoto que será consumido por la aplicación host.

Conclusión
¡Vite + Module Federation es una combinación poderosa que nos permite crear aplicaciones frontend escalables y es muy fácil de implementar!
Espero que esta guía te haya sido útil, que puedas comenzar a usarla en tus proyectos y que la compartas con tus colegas.
Si tienes alguna pregunta, no dudes en hacerla a través de redes sociales.
Happy coding!