
Aprende a implementar un envío de correos electrónicos programados con Spring Boot y Resend
Introducción
Resend se trata de una tecnología que permite integrar el envío de correos electrónicos de una forma sencilla y sin preocupaciones en materia de infraestructura. En este tutorial, aprenderás a implementar una tarea programada en Spring Boot para enviar correos electrónicos de forma sencilla.
Paso 1: Creación del proyecto de Spring Boot
Para comenzar, necesitamos crear un proyecto de Spring Boot. Para ello, puedes utilizar Spring Initializr. Asegúrate de seleccionar las siguentes dependencias:
- Spring Web
- Spring Boot DevTools
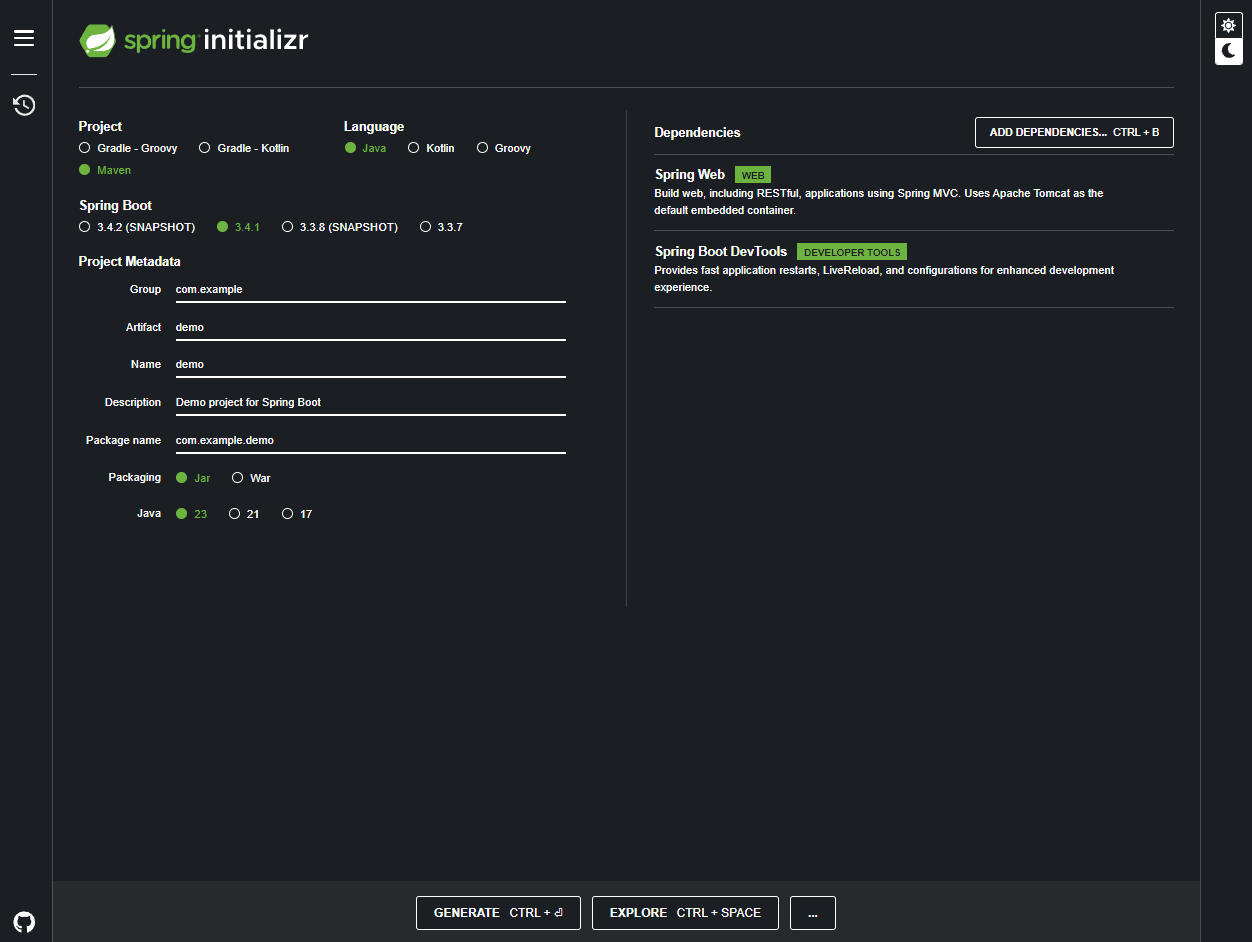
Después, descargalo y descomprímelo en tu directorio de trabajo. A continuación, abre tu proyecto en tu IDE o editor de texto favorito, yo estaré utilizando Visual Studio Code.
Paso 2: Implementación de Resend como dependencia y configuración
Abre el archivo pom.xml y agrega la siguiente dependencia:
<dependency>
    <groupId>com.resend</groupId>
    <artifactId>resend-java</artifactId>
    <version>3.1.0</version>
</dependency>
Debe quedar de la siguiente manera:
<?xml version="1.0" encoding="UTF-8"?>
<project xmlns="http://maven.apache.org/POM/4.0.0" xmlns:xsi="http://www.w3.org/2001/XMLSchema-instance"
	xsi:schemaLocation="http://maven.apache.org/POM/4.0.0 https://maven.apache.org/xsd/maven-4.0.0.xsd">
	<modelVersion>4.0.0</modelVersion>
	<parent>
		<groupId>org.springframework.boot</groupId>
		<artifactId>spring-boot-starter-parent</artifactId>
		<version>3.4.1</version>
		<relativePath/> <!-- lookup parent from repository -->
	</parent>
	<groupId>com.example</groupId>
	<artifactId>demo</artifactId>
	<version>0.0.1-SNAPSHOT</version>
	<name>demo</name>
	<description>Demo project for Spring Boot</description>
	<url/>
	<licenses>
		<license/>
	</licenses>
	<developers>
		<developer/>
	</developers>
	<scm>
		<connection/>
		<developerConnection/>
		<tag/>
		<url/>
	</scm>
	<properties>
		<java.version>23</java.version>
	</properties>
	<dependencies>
		<dependency>
			<groupId>org.springframework.boot</groupId>
			<artifactId>spring-boot-starter-web</artifactId>
		</dependency>

		<dependency>
			<groupId>org.springframework.boot</groupId>
			<artifactId>spring-boot-devtools</artifactId>
			<scope>runtime</scope>
			<optional>true</optional>
		</dependency>
		<dependency>
			<groupId>org.springframework.boot</groupId>
			<artifactId>spring-boot-starter-test</artifactId>
			<scope>test</scope>
		</dependency>
		<dependency>
			<groupId>com.resend</groupId>
			<artifactId>resend-java</artifactId>
			<version>3.1.0</version>
		</dependency>
	</dependencies>

	<build>
		<plugins>
			<plugin>
				<groupId>org.springframework.boot</groupId>
				<artifactId>spring-boot-maven-plugin</artifactId>
			</plugin>
		</plugins>
	</build>
</project>
Paso 3: Servicio de correo
Necesitamos crear un servicio que envíe correos electrónicos. Para ello, crea una clase llamada EmailService en el paquete com.example.demo.service y agrega el siguiente código:
package com.example.demo.service;

import com.resend.*;
import com.resend.core.exception.ResendException;
import com.resend.services.emails.model.CreateEmailOptions;

import org.springframework.beans.factory.annotation.Value;
import org.springframework.stereotype.Service;

@Service
public class EmailService {
    @Value("${resend.token}")
    private String emailToken;

    @Value("${resend.email.to}")
    private String emailTo;


    public void sendEmail() {
        Resend resend = new Resend(emailToken);

        try {
            CreateEmailOptions params = CreateEmailOptions.builder()
            .from("Acme <[email protected]>")
            .to(emailTo)
            .subject("it works!")
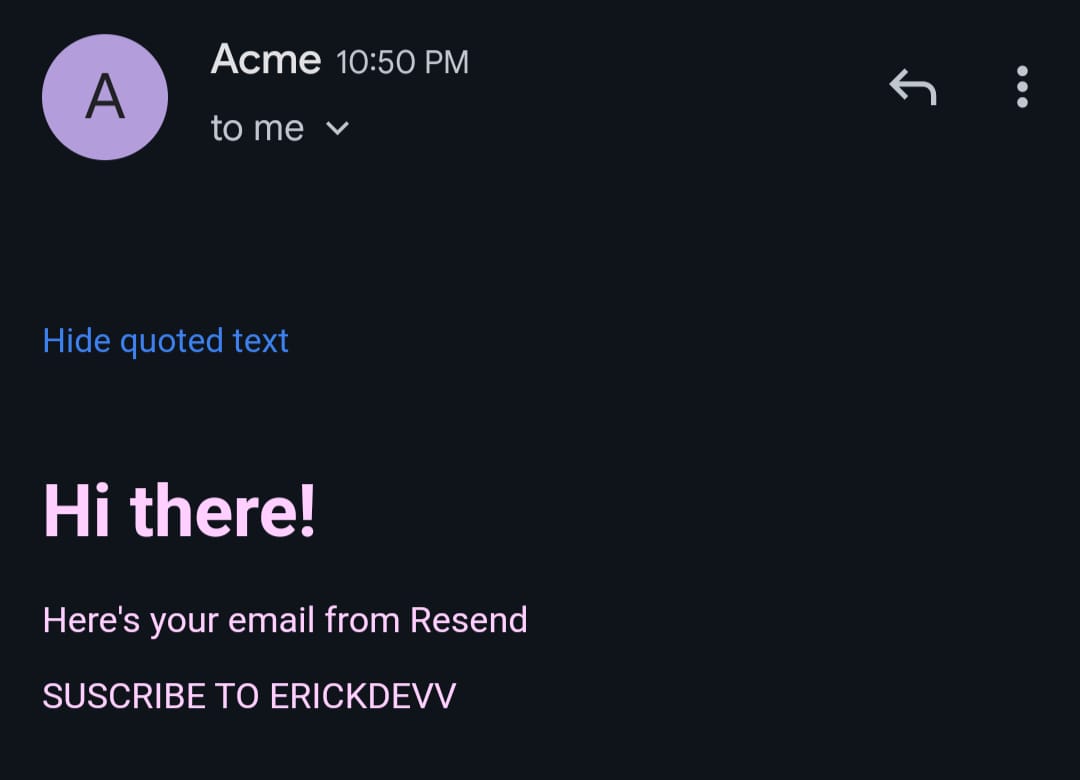
            .html("<h1>Hi there!</h1><p>Here's your email from Resend</p> <p>SUSCRIBE TO ERICKDEVV</p>")
            .build();
            resend.emails().send(params);
        } catch (ResendException e) {
            e.printStackTrace();
        }
    }
}
Como puedes ver, hemos creado un método enviarCorreo que envía un correo electrónico utilizando Resend. Para ello, necesitamos el token de Resend, que se almacena en el archivo application.properties. A continuación, agrega las siguientes propiedades en el archivo application.properties:
resend.token=<your_resend_token>
resend.email.to=<the_email_to_send>
El token de Resend lo puedes obtener en la página de Resend. Registrate y obtén tu token en la sección de API Keys/Create API Key, da click en Create API Key.
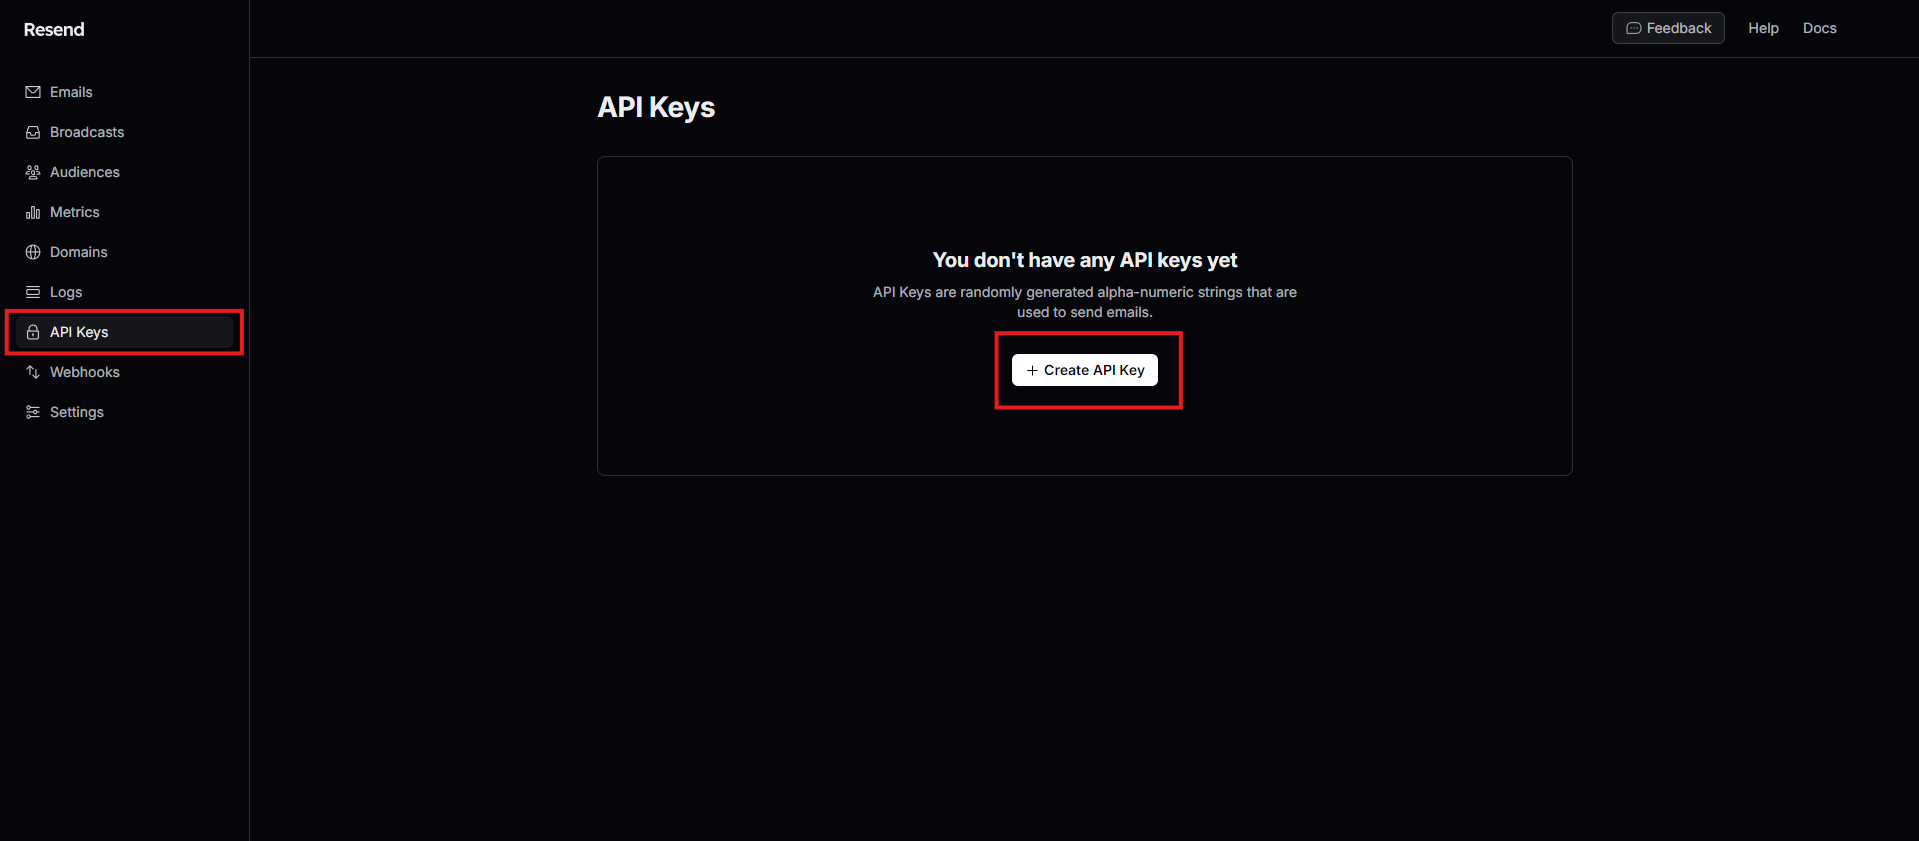
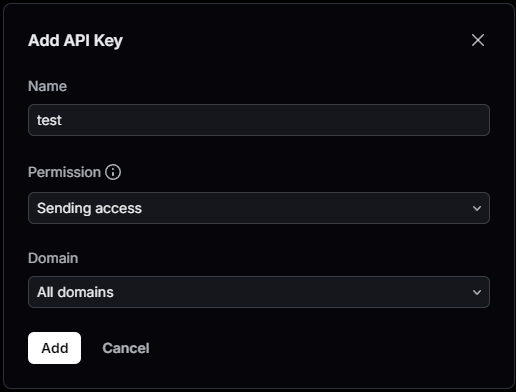
Después, llenas los campos y das click en Add.
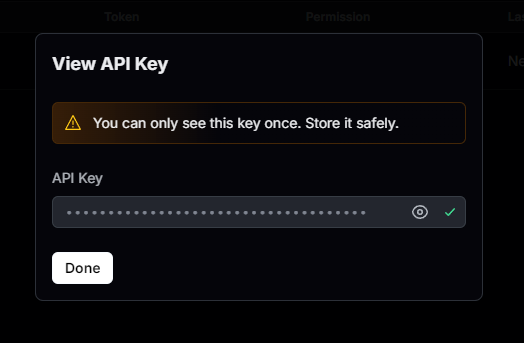
Finalmente copia tu token.
Reemplaza <your_resend_token> y <the_email_to_send> con tu token de Resend y el correo electrónico al que deseas enviar el correo electrónico, respectivamente.
Ahora, crea en resources la carpeta META-INF y dentro de ella el archivo additional-spring-configuration-metadata.json con el siguiente contenido:
{
  "properties": [
    {
      "name": "resend.email.to",
      "type": "java.lang.String",
      "description": "The email address to send the email to"
    },
    {
      "name": "resend.token",
      "type": "java.lang.String",
      "description": "The Resend token"
    }
  ]
}
Lo anterior es necesario para que Spring Boot pueda reconocer las propiedades que hemos definido en el archivo application.properties.
Paso 4: Scheduler Task
Ahora es el momento de crear la tarea programada que se ejecute de forma programada a intervalos regulares. Para ello, crea una clase llamada EmailScheduler en el paquete com.example.demo.scheduler y agrega el siguiente código:
package com.example.demo.scheduler;

import org.springframework.beans.factory.annotation.Autowired;
import org.springframework.scheduling.annotation.Scheduled;
import org.springframework.stereotype.Component;

import com.example.demo.service.EmailService;

@Component
public class EmailScheduler {

    @Autowired
    private EmailService emailService;


    @Scheduled(cron = "0 */5 * * * *", zone = "America/Mexico_City")
    public void sendEmail() {
        try {
            emailService.sendEmail();
            System.out.println("Email sent successfully");
        } catch (Exception e) {
            System.out.println("Error sending email: " + e.getMessage());
        }
    }
}
Hemos creado un método sendEmail que se ejecuta cada 5 minutos. Puedes personalizar el intervalo de tiempo según tus necesidades. Además, hemos realizado una inyección de dependencia del servicio EmailService para enviar correos electrónicos y se ha definido que la zona horaria sea la de la Ciudad de México (puedes cambiarla según tu ubicación).
Deberemos agregar la anotación @EnableScheduling en una clase de configuración para habilitar la programación en Spring Boot. Para ello, crea una clase llamada SchedulingConfig en el paquete com.example.demo.config y agrega el siguiente código:
package com.example.demo.config;

import org.springframework.context.annotation.Configuration;
import org.springframework.scheduling.annotation.EnableScheduling;

@Configuration
@EnableScheduling
public class SchedulingConfig {
}
Ahora, ejecuta tu aplicación de Spring Boot y verás que se envía un correo electrónico cada 5 minutos al correo electrónico especificado.
Paso 5: Conclusión
Resend es una herramienta que se integra de una manera muy sencilla a las aplicaciones hechas con Spring Boot, es realmente potente y no requiere ninguna infraestructura adicional. De forma personal, me ha gustado mucho trabajar con Resend y espero que a ti también te haya gustado.
Happy coding!